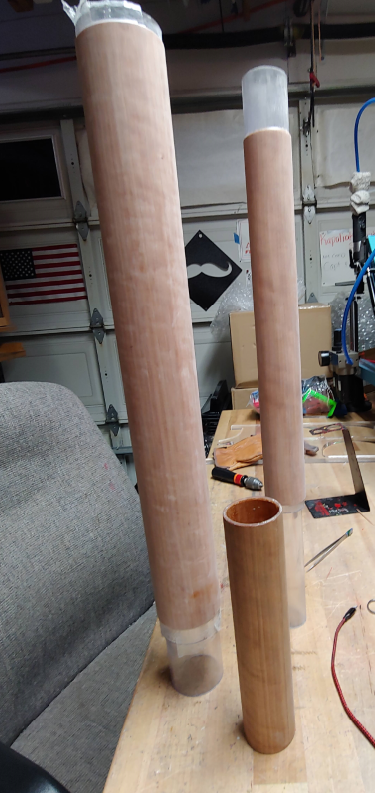
This is a bit of an information dump of everything I’ve learned so far in the process of making wood tubes from veneer sheets for Cherry Bomb, the hardtail I’m working on.
The process of making wood tubes is not terribly hard, but is a bit finicky and time consuming. I’m sure there are improvements to be made to the process, and that is something that I’m actively thinking about, but for the time being, this will serve as a guide to how I made the tubes for Cherry Bomb and a resource for anyone else looking to do something similar.
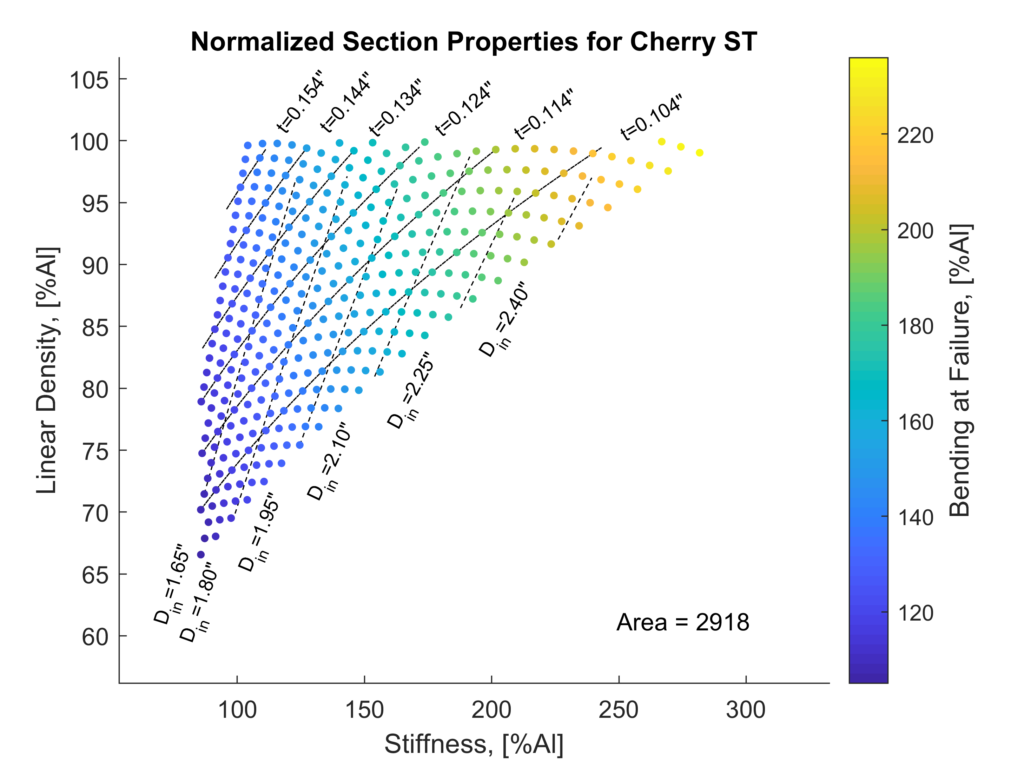
To start, a few things need to be established: tube inner diameter, outer diameter, length, and veneer thickness. I used a MATLAB script to calculate the tube diameter and thickness combinations that would give me the desired section properties (strength, stiffness, and density) for the particular wood I used (cherry). Additionally, I didn’t want to spend crazy amounts of money making molds for these tubes which limited the actual diameters I could make to something that I could find commercially and cheaply available.
I chose to make these tubes using an internal mandrel as opposed to an external mold. This decision was primarily driven by a desire to control the inner diameter of the tube, to mate up nicely with the lugs I will machine. Additionally, I originally intended to wrap the veneers on a bias for the first two layers (+45° and -45°) like I had seen in a video online that I can sadly no longer find. However, this ended up not working well.
I made some very simple expanding mandrels for these tubes using a couple of clear PETG tubes I got from McMaster Carr. The outer tube has a slit cut along it’s length, and the inner tube has an outer diameter that is a close fit to the inner diameter of the outer tube. The outer tube, with the slit, tends to collapse the slit shut, unless the inner tube is slid inside it, which forces it to expand to it’s original diameter.
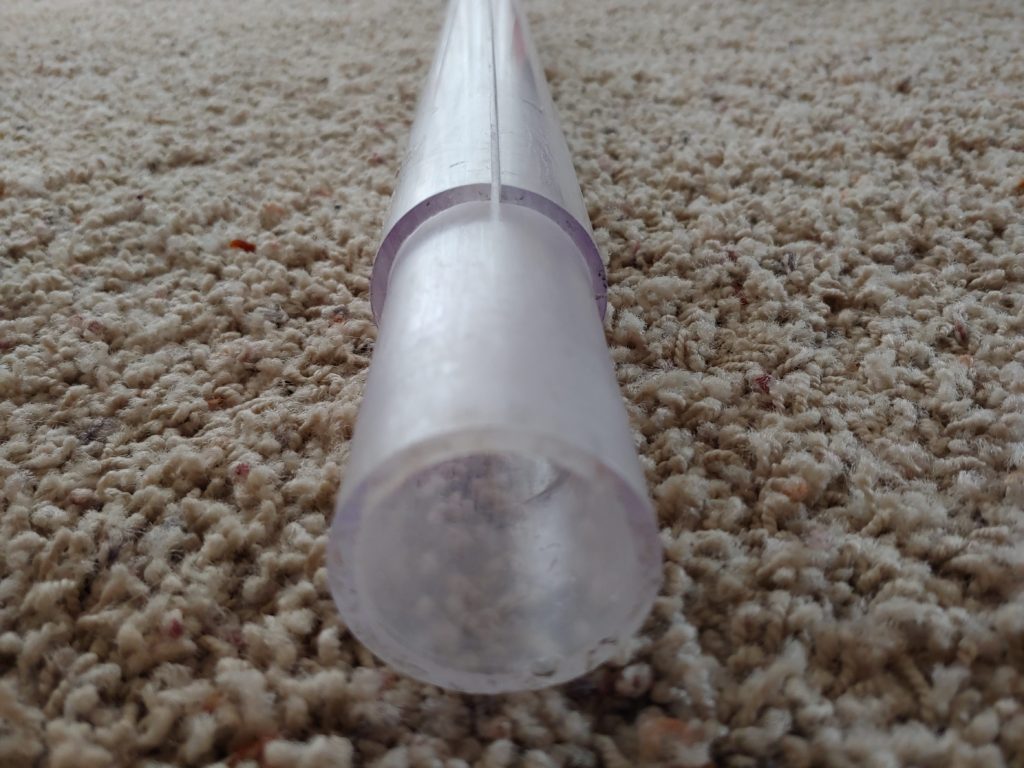
Using the clear tubes from McMaster Carr is nice for a couple reasons. The tubes come in 1/4″ increments of outer diameter, with 1/8″ wall thickness. This means that, at least nominally, the outer diameter of one size of tube is the same as the inner diameter of the next largest size. This means, with a slit cut into the larger tube, the smaller acts as a ready made expander. The other key feature of these tubes is the price. A 2 foot length of any of the diameters I used was about $15, so in all I spent $60 on expanding mandrels that took me about 1 hour to make (not including the tubes I ruined and the hours I spent getting to that design, but that is why I’m writing this, so that anyone else who wants to make tubes like this can benefit from my failures).
So, I’ve established the tube size I want, both diameter and wall thickness, as well as the length (driven from the overall frame geometry in my SolidWorks model), and I’ve made a mandrel that will give me the inner diameter I’m looking for. Next is to start laying up onto the mandrel.
I found that it was necessary to have some way of preventing the epoxy from bonding to the mandrel, so the solution that I came up with that worked the best was to line the inside of the first layer of veneer with clear packing tape (sticky side out). This acts as a barrier keeping the epoxy from coming into contact with the mandrel and also serves to hold the first layer in shape while loading onto the mandrel before the second layer is glued on.
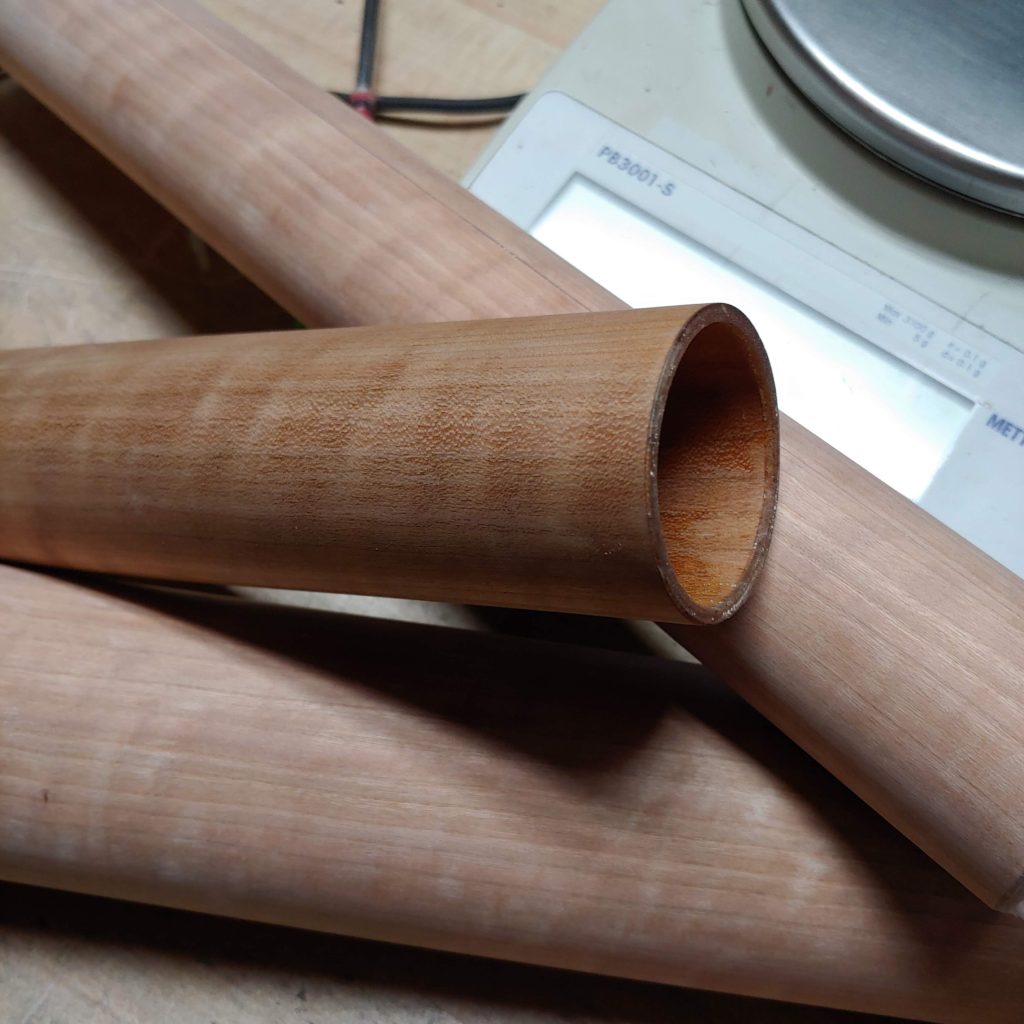
I built these tubes one layer at a time, cutting the veneer so that it was a tight wrap with no overlap. This was time consuming and meant that it took several days to make the tubes while waiting for each layer to cure before sanding and adding the next layer.
To clamp each layer onto the previous I used electrical tape. This is a tip I picked up from Ligneous bikes. Epoxy doesn’t stick to electrical tape, and it has enough elasticity to apply clamping pressure to keep the layers tightly pressed together until the epoxy cures.